 Help Center
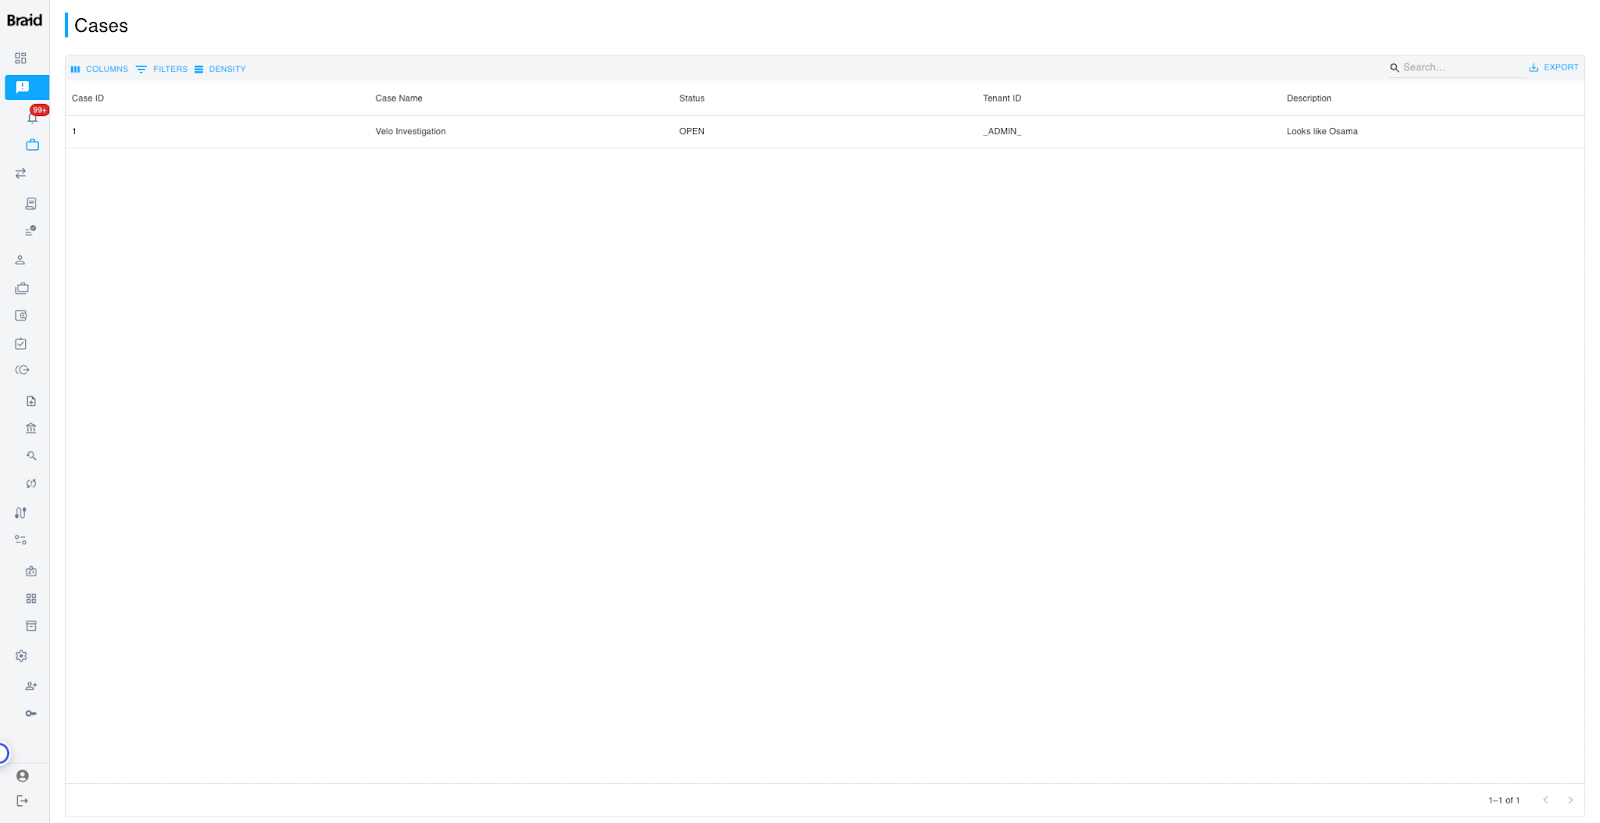
The Cases screen in the Braid interface serves as a centralized location for managing investigations, reviews, and compliance-related cases. It provides a clear overview of each case, including its status and relevant details. This tool is essential for ensuring that cases are properly tracked and documented, supporting compliance and audit needs.
Key Features
-
Cases Table:
-
The table lists all cases currently being tracked in the system. Each row represents a specific case and displays important information such as:
-
Case ID: A unique identifier for each case (e.g., 1), allowing users to reference specific cases quickly.
-
Case Name: A descriptive name for the case (e.g., "Velo Investigation"), providing context about the focus or nature of the investigation.
-
Status: Indicates the current state of the case, such as:
-
OPEN: The case is active and under investigation.
-
CLOSED: The investigation or review has been completed.
-
APPROVED or DECLINED: Indicates decisions made during the review process.
-
Tenant ID: Shows which tenant or administrative group the case is associated with (e.g., _ADMIN_), helping to categorize cases by the responsible party.
-
Description: Provides a brief summary or explanation of the case (e.g., "Looks like Osama"), offering insight into what the investigation is about.
-
Filtering, Columns, and Density Options:
-
Filters: Refine the list of cases by applying filters such as status or tenant ID, allowing users to focus on specific investigations.
-
Columns: Customize which columns are visible in the table, helping users focus on the most relevant information.
-
Density: Adjust the display density to show more or fewer details per row, depending on your viewing preference.
-
Search and Export Functionality:
-
Search: Use the search bar to quickly find specific cases by entering keywords, case names, or descriptions, making it easier to locate important cases.
-
Export: The EXPORT button allows users to download a list of cases, which is useful for maintaining offline records or supporting compliance audits.
How to Use the Cases Screen
-
Review and Track Cases:
-
Navigate to the Cases screen to view a list of all ongoing and completed cases.
-
Monitor the Status column to determine which cases are still active (OPEN) and require attention or follow-up.
-
Click on a Case ID or Case Name (if clickable) to access more detailed information about a specific case.
-
Filter and Search for Specific Cases:
-
Use the Filters to narrow down the cases displayed, focusing on specific statuses like OPEN or CLOSED cases, or those tied to a particular tenant.
-
Utilize the Search bar to find a case by typing in relevant keywords, making it easier to locate cases quickly without scrolling through the list.
-
Export Case Data:
-
Click the EXPORT button to download a record of all cases or a filtered list, creating a file that can be used for internal reviews, compliance documentation, or audits.
-
The exported file helps maintain a clear record of the investigations and actions taken, supporting transparency and compliance.
Best Practices
-
Regularly Monitor OPEN Cases: Prioritize reviewing OPEN cases to ensure that ongoing investigations are addressed promptly and do not remain unresolved.
-
Maintain Clear Case Names and Descriptions: Use descriptive names and detailed descriptions for each case to ensure easy identification and context for future reference.
-
Utilize Filters for Focused Reviews: Use filtering options to focus on high-priority cases, such as those that have been recently updated or require administrative review.
-
Export Records for Audits: Regularly export case records to maintain up-to-date documentation, making it easier to meet compliance requirements during audits or reviews.
Case Details
The Case Details screen in the Braid interface provides a detailed view of a specific case, such as an investigation or review process. It allows users to monitor the status of the case, manage linked alerts, and take actions to resolve the case. This tool is crucial for ensuring that investigations are documented comprehensively and that all associated alerts are properly addressed.
Key Features
-
Case Overview:
-
Displays critical information about the case, including:
-
Case ID: A unique identifier for each case (e.g., 1).
-
Name: The descriptive name of the case (e.g., "Velo Investigation").
-
Status: Indicates the current status of the case, such as:
-
OPEN: The case is active and requires attention.
-
CLOSED: The case has been resolved.
-
Tenant ID: Identifies the tenant or administrative group responsible for the case (e.g., _ADMIN_).
-
Description: Provides context or a brief explanation of the case (e.g., "Looks like Osama").
-
Linked Alerts:
-
Lists any alerts associated with the case, providing a clear view of the issues being investigated.
-
Alert Table Columns include:
-
Alert ID: The unique identifier for each linked alert (e.g., 193).
-
Type: Indicates the nature of the alert (e.g., Dual Approval).
-
Status: Shows the status of the alert (e.g., Escalated), providing insight into the alert's review progress.
-
Context Type: Describes the type of context for the alert (e.g., Velocity Limit).
-
Context ID: A clickable link that directs users to more details about the specific alert context.
-
Description: Summarizes the alert or its context (e.g., "Velocity rule Maker Checker Limit is set for deactivation").
-
Actions:
-
Resolve Case: This button allows users to mark the case as resolved once all necessary actions have been completed. Closing the case indicates that no further review is needed.
-
Tabs for Additional Information:
-
Case Notes: (Not visible in the screenshot) Add notes related to the case, providing a record of actions or decisions.
-
Case Timelines: (Not visible in the screenshot) View the history of actions taken on the case, such as when it was created, updated, or resolved.
-
Documents: (Not visible in the screenshot) Upload and access files related to the case, such as compliance records or supporting documentation.
How to Use the Case Details Screen
-
Review Case Information:
-
Use the Case Overview section to understand the case's basic details, such as its name, status, and description.
-
This provides a quick summary of the case and helps users assess its current state and focus.
-
Manage Linked Alerts:
-
Review the Linked Alerts table to see the alerts associated with the case.
-
Click on the Context ID link to access more details about specific alerts if further investigation is required.
-
Monitor the Status of each alert to ensure that all issues are addressed before resolving the case.
-
Resolve the Case:
-
When all alerts have been managed and the investigation is complete, click the Resolve Case button.
-
Resolving the case indicates that the review process is complete, and the case can be closed.
-
Use Additional Tabs:
-
Document your observations in the Case Notes tab to maintain a record of all decisions and actions taken during the review.
-
Use the Case Timelines tab to track the sequence of actions taken on the case, helping maintain a clear audit trail.
-
Upload relevant files in the Documents tab, such as reports or evidence, to ensure that all supporting documentation is easily accessible.
Best Practices
-
Regularly Monitor OPEN Cases: Focus on OPEN cases to ensure that active investigations are promptly addressed.
-
Thoroughly Document Notes: Use the Case Notes tab to detail actions and decisions, providing clarity for future reference and audits.
-
Review Linked Alerts Carefully: Make sure that all alerts connected to the case are fully resolved before closing the case.
-
Use the Timeline for Audits: The Case Timelines tab is valuable for tracking the history of actions, supporting transparency and accountability during audits.
Case Notes
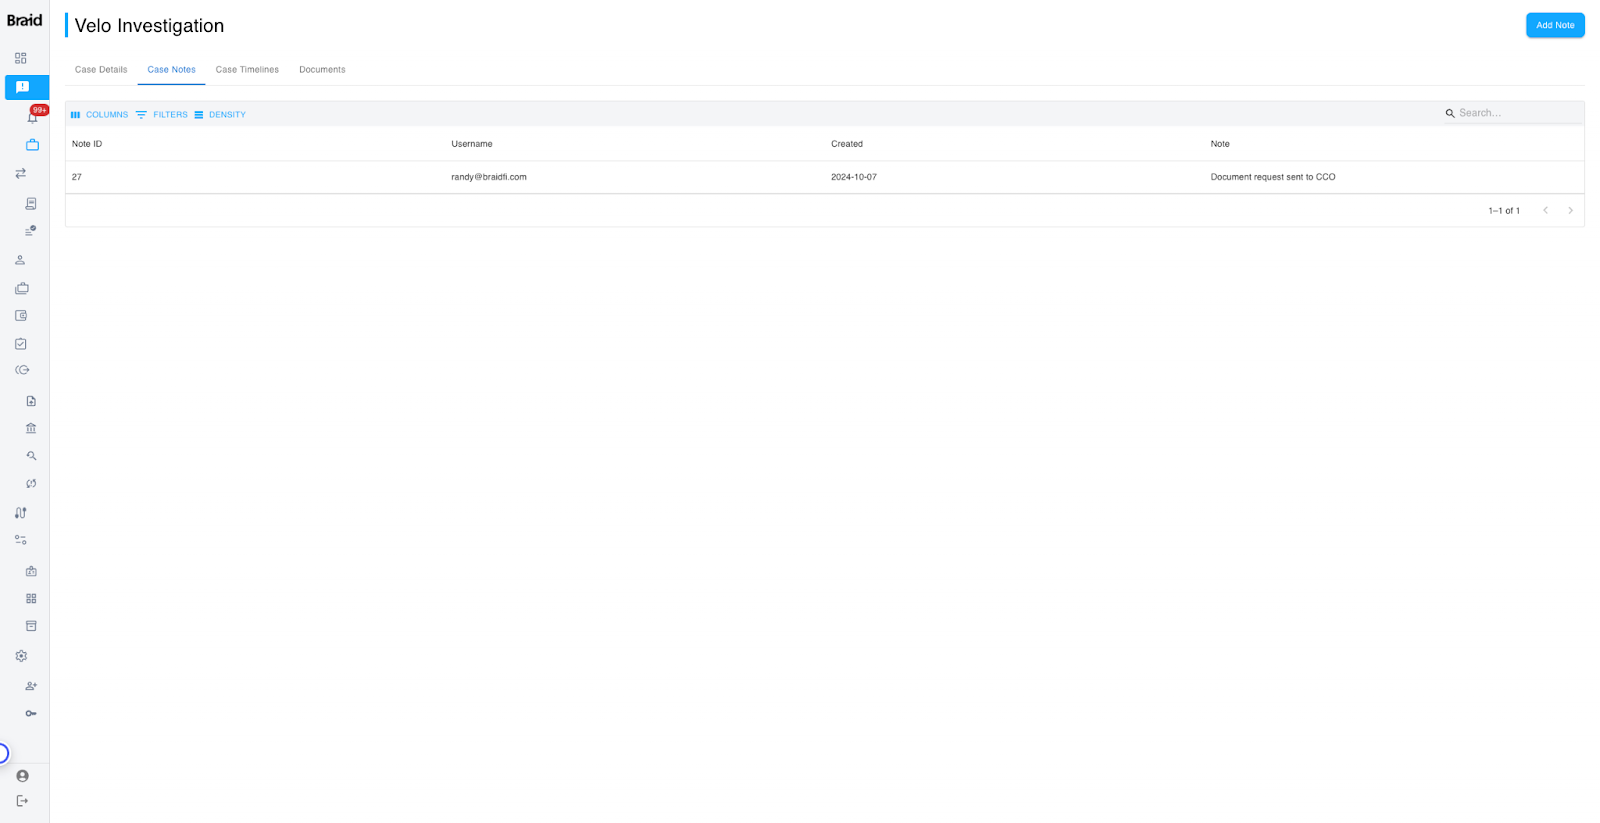
The Case Notes tab in the Braid interface allows users to add and view notes related to a specific case. It provides a space to document actions, observations, or communications throughout the case's lifecycle, creating a comprehensive record of the investigation process. This feature is crucial for maintaining an audit trail and ensuring transparency during case management.
Key Features
-
Notes Table:
-
Displays all notes associated with the selected case.
-
Table Columns include:
-
Note ID: A unique identifier for each note entry, helping users reference specific notes (e.g., 27).
-
Username: Indicates the user who added the note (e.g., randy@braidfi.com), ensuring accountability for each entry.
-
Created: Shows the date when the note was added (e.g., 2024-10-07), providing a timeline of actions or observations.
-
Note: Contains the text or content of the note (e.g., "Document request sent to CCO"), summarizing the action or information recorded.
-
Add Note:
-
The Add Note button allows users to add new notes to the case.
-
Clicking this button opens a field where users can enter details about their observations, actions, or any other relevant information.
-
Filtering, Columns, and Density Options:
-
Filters: Allows users to refine the displayed notes based on criteria such as specific users or date ranges, making it easier to focus on particular entries.
-
Columns: Customize which columns are displayed to focus on the most relevant details for your review.
-
Density: Adjust the display density to show more or fewer details per row, depending on user preference.
-
Search Functionality:
-
The Search bar enables users to quickly locate specific notes by entering keywords, making it easier to find particular entries without scrolling through the list.
How to Use the Case Notes Tab
-
Adding a Note:
-
Click the Add Note button to create a new entry.
-
Enter the details of your note in the provided field, such as a summary of an action taken, a decision made, or a request sent.
-
Click Save to add the note, ensuring that it is recorded as part of the case's documentation.
-
Reviewing Notes:
-
Use the Notes Table to review the history of all notes associated with the case.
-
Look through the Note ID, Username, Created date, and Note content to understand the actions and decisions recorded over time.
-
This helps users maintain a clear record of all developments in the case.
-
Filtering and Searching for Specific Notes:
-
Use the Filters option to narrow down notes by specific users or date ranges, making it easier to focus on recent actions or specific contributors.
-
Use the Search bar to find notes containing specific terms or phrases, allowing you to quickly access the information you need without manual scrolling.
Best Practices
-
Document All Key Actions: Use the Case Notes tab to record every important action, observation, or decision during the case review process. This ensures that a comprehensive history is maintained.
-
Use Clear Descriptions: Write clear and concise notes, making it easier for others to understand the context and purpose of each entry.
-
Regularly Review and Update: Keep the notes updated throughout the investigation, ensuring that all actions are documented promptly.
-
Utilize Filters for Focused Reviews: Use the filtering options to focus on notes from specific dates or users, especially during audits or detailed case reviews.
Case Timelines
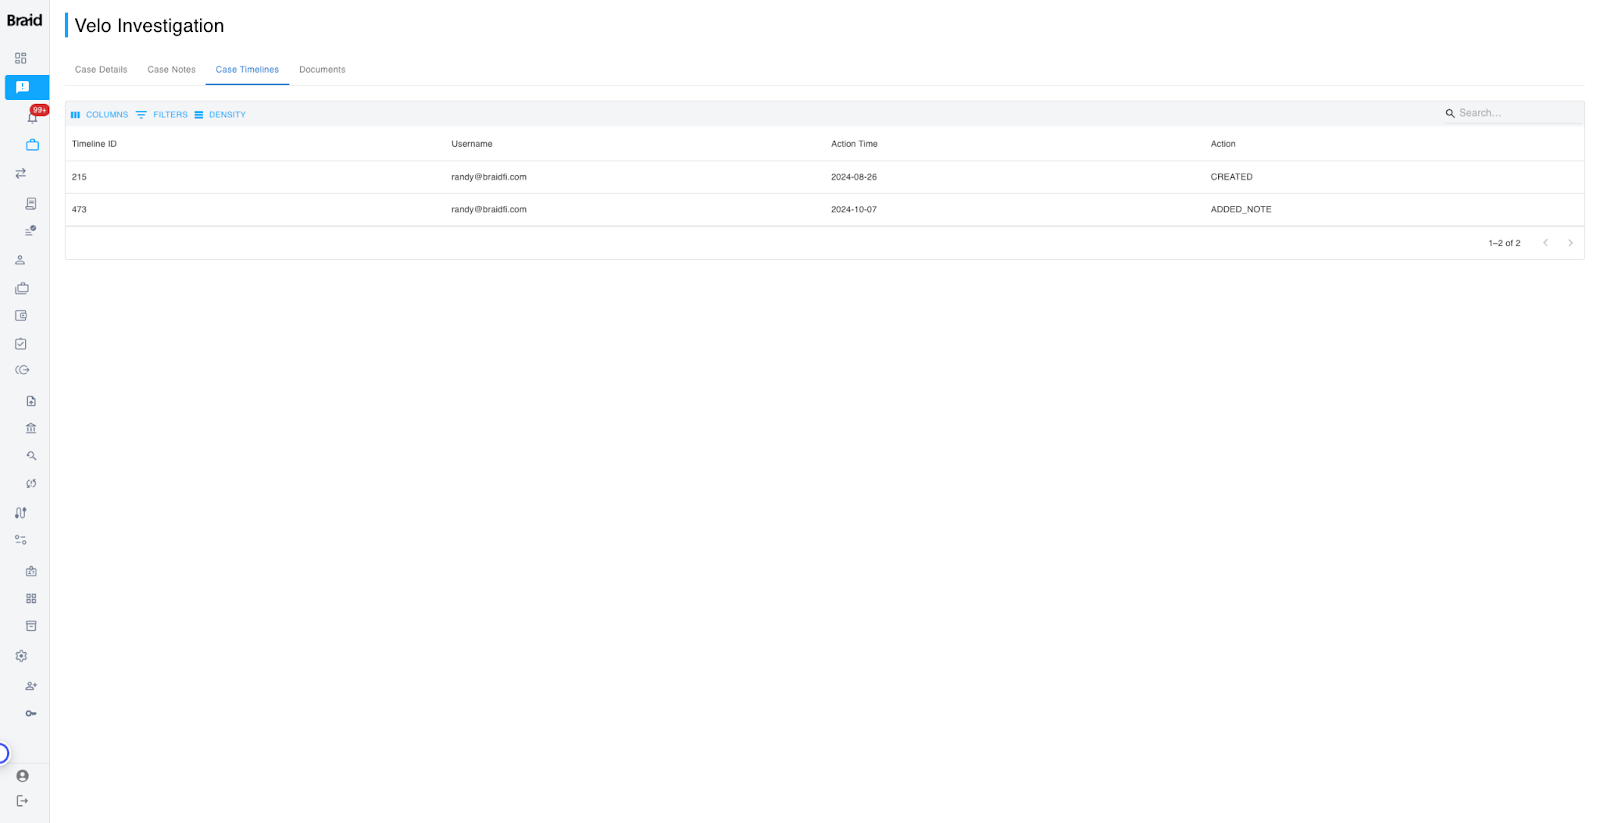
The Case Timelines tab in the Braid interface provides a detailed, chronological record of all actions taken on a specific case. It allows users to monitor the sequence of events throughout the case's lifecycle, supporting transparency, accountability, and compliance. This feature is especially valuable for audits and reviews, offering a clear history of how the case was managed.
Key Features
-
Timeline Table:
-
Displays all actions associated with the selected case in chronological order.
-
Table Columns include:
-
Timeline ID: A unique identifier for each action entry (e.g., 215, 473), making it easy to reference specific events.
-
Username: Indicates the user who performed each action (e.g., randy@braidfi.com), ensuring accountability.
-
Action Time: Shows the date and time when the action occurred (e.g., 2024-08-26 or 2024-10-07), providing a precise timeline.
-
Action: Describes the type of action taken (e.g., CREATED, ADDED_NOTE), offering context about what changes or updates were made.
-
Filtering, Columns, and Density Options:
-
Filters: Allows users to refine the displayed actions based on criteria such as date ranges or specific users, making it easier to focus on relevant events.
-
Columns: Customize which columns are displayed in the table, helping users focus on the most pertinent details.
-
Density: Adjust the display density for a more compact or detailed view of the timeline, depending on user preferences.
-
Search Functionality:
-
The Search bar enables users to quickly find specific actions by entering keywords, making it easy to locate entries without scrolling through the entire list.
How to Use the Case Timelines Tab
-
Reviewing the History of Actions:
-
Navigate to the Case Timelines tab to view a complete list of all actions taken on the selected case.
-
Use the Action Time and Action columns to see when key events occurred, such as when the case was CREATED or when a NOTE was added.
-
The Username column helps identify who performed each action, providing a clear record of user involvement in the case.
-
Filtering and Searching for Specific Events:
-
Apply Filters to focus on actions from a particular time period or specific users, making it easier to review the events that matter most.
-
Use the Search bar to find particular actions or keywords, saving time when looking for specific details.
-
Customize the View:
-
Adjust the Columns settings to display only the information you need, such as focusing on the Action and Action Time columns for a quick overview.
-
Use the Density options to change the table’s format, allowing you to display more information in a compact view or space out entries for easier reading.
Best Practices
-
Review Actions Regularly: Use the Case Timelines tab to monitor ongoing actions and ensure that all updates are properly recorded.
-
Document Important Events: Ensure that every key action is documented accurately, creating a reliable record for audits and reviews.
-
Use Filters for Detailed Reviews: Apply filters to focus on critical periods or user activities, especially when investigating specific issues or events.
-
Search for Quick Access: Use the search feature to quickly locate entries by keywords, saving time during reviews.
Case Documents
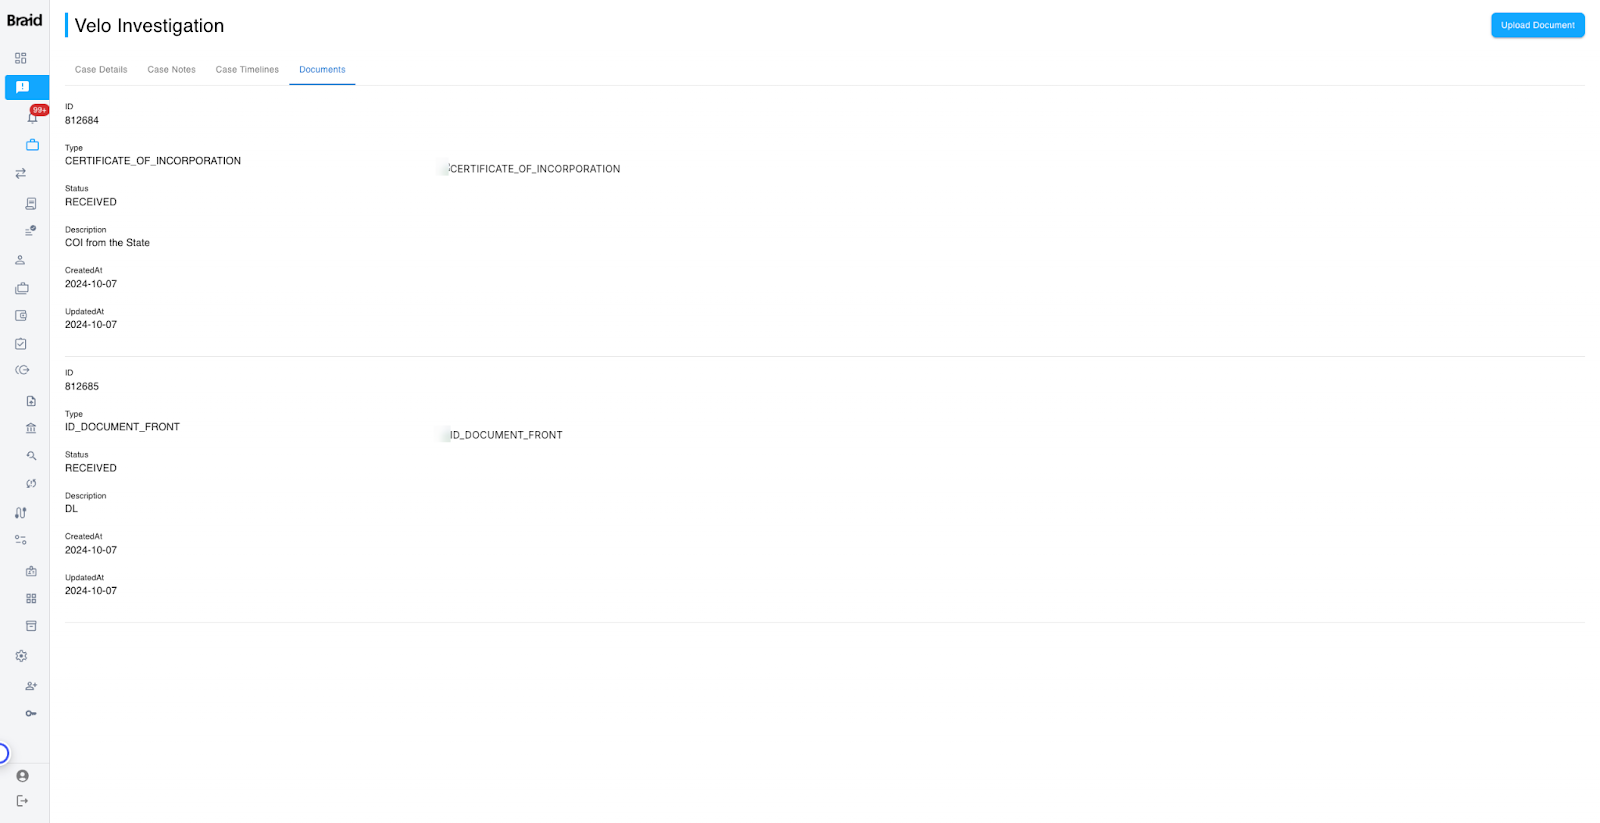
The Documents tab in the Braid interface serves as a centralized repository for all files related to a specific case. It allows users to upload, view, and manage documents that support the investigation or review process. This feature is crucial for keeping records organized, ensuring compliance, and providing easy access to necessary documentation during audits or further reviews.
Key Features
-
Document List:
-
Displays all documents associated with the selected case in an organized list.
-
Document Details include:
-
ID: A unique identifier for each document (e.g., 812684).
-
Type: Describes the type of document (e.g., CERTIFICATE_OF_INCORPORATION, ID_DOCUMENT_FRONT), indicating its purpose.
-
Status: Shows the current status of the document (e.g., RECEIVED), helping users track which documents have been processed.
-
Description: Provides additional context about the document (e.g., "COI from the State" or "DL"), offering insight into the document’s relevance to the case.
-
CreatedAt and UpdatedAt: Display the dates when the document was initially uploaded and when it was last updated.
-
Upload Document:
-
The Upload Document button allows users to add new files to the case directly from their computer.
-
This feature enables users to ensure that all necessary documents are attached to the case for comprehensive review and tracking.
-
Document Access and Management:
-
Users can click on a document entry to view or download the file.
-
This ensures that all necessary documents are readily accessible during the review process and can be shared or referenced as needed.
How to Use the Documents Tab
-
Uploading a Document:
-
Click the Upload Document button to add a new file.
-
Select the desired file from your computer and fill in any required details, such as the document type and description.
-
Click Save to upload the document. It will then appear in the Document List with its unique ID and details.
-
Reviewing Uploaded Documents:
-
Use the Document List to see all files associated with the case.
-
Review the Type and Description fields to understand the purpose of each document.
-
The Status column helps determine which documents have been received or processed, aiding in tracking the document’s review status.
-
Accessing Documents:
-
Click on a document entry to view or download the file.
-
This functionality allows users to quickly retrieve documents for review, sharing, or compliance checks.
-
Tracking Document History:
-
Refer to the CreatedAt and UpdatedAt fields to track when documents were added or last modified.
-
This helps maintain a clear timeline of documentation, ensuring transparency and supporting audits.
Best Practices
-
Organize Documents by Type: Use the Type field to categorize documents accurately, making it easier to locate specific files during reviews.
-
Update Document Status Regularly: Keep the Status of each document up to date to provide clarity on which documents have been reviewed or are pending.
-
Use Clear Descriptions: Write detailed descriptions for each document to ensure that the context is clear to all users involved in the case.
-
Regularly Review Document History: Use the CreatedAt and UpdatedAt fields to ensure that all documents are current and that the history of changes is accurately recorded.